
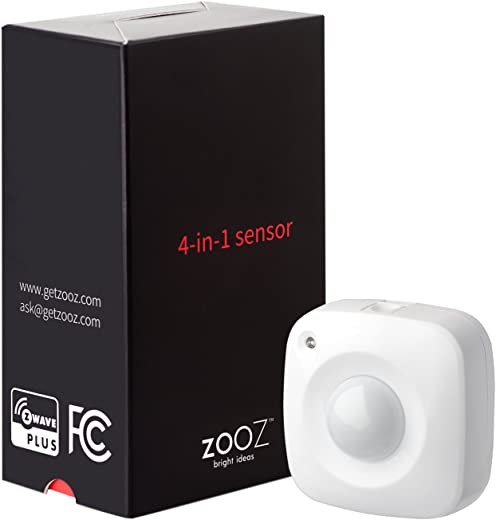



ZOOZ Z-Wave Plus 4-in-1 Sensor ZSE40 VER. 2.0 (Motion/Light/Temperature/Humidity)
$37.95
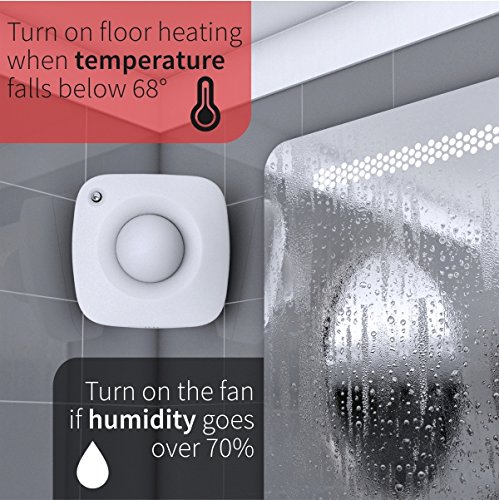
- 4 SMART SENSORS IN 1: This compact device detects and reports motion, temperature, humidity, and light level to your smart home app. Compatible Z-Wave hub required, sold separately.
- NEW IMPROVED VERSION: The included CR123A battery makes the sensor lasts much longer than the previous version. Updated motion detection allows you to get even quicker activity reports.
- CUSTOMIZE IT: Choose from 7 levels of motion sensitivity, adjust the motion re-trigger interval, and pick from 4 different LED indicator modes (your hub needs to support advanced parameter input).
- SECURITY FIRST: This sensor is equipped with bank-grade AES signal encryption. It’s Z-Wave Plus certified to ensure it complies with the highest industry standards.
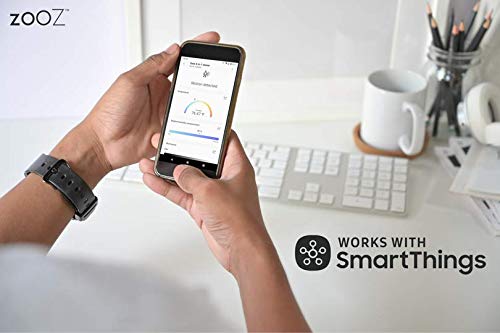
- WILL IT WORK WITH MY HUB? This sensor is NOT supported by Wink, Vivint, ADT Pulse, Qolsys, or other Z-Wave alarm panels. It will work great with open systems like Almond (Securify), HomeSeer, Home Assistant, Hubitat, SmartThings Hub with custom device handler (contact seller for instructions), VeraEdge, VeraLite (running under UI7), and VeraPlus.
Specification: ZOOZ Z-Wave Plus 4-in-1 Sensor ZSE40 VER. 2.0 (Motion/Light/Temperature/Humidity)
| Package Dimensions | 5.6 x 3.3 x 2.3 inches |
|---|---|
| Item Weight | 0.32 ounces |
| Item model number | 4336302850 |
| Batteries | 1 CR123A batteries required. |
| Is Discontinued By Manufacturer | No |
| Date First Available | January 13, 2016 |
| Manufacturer | ZOOZ |
5 reviews for ZOOZ Z-Wave Plus 4-in-1 Sensor ZSE40 VER. 2.0 (Motion/Light/Temperature/Humidity)
Add a review
Related Products

Added to wishlistRemoved from wishlist 0

Added to wishlistRemoved from wishlist 0
Added to wishlistRemoved from wishlist 0
Adam B. –
Not sure on accuracy, but it paired and is functioning as desired.
RetiredEE –
I have some information that I believe will explain why some people, if not all, are having issues with battery life from the ZSE40 4-in-1 sensor.
First, let’s talk about what “battery life” means. Is it the time until you see your controller displays “0% battery capacity” (or something like that), or is it the length of time you actually got from a set of batteries before the sensor just stopped reporting anything back to the controller app? It turns out, they are two entirely different matters.
I ran a simple experiment where I substituted an inexpensive lab power supply for the batteries in the ZSE40, and then varied the voltage to the battery terminals while observing what my controller app (Indigo 7.0.3 running on a Mac) displayed as “Battery Level.” (Your controller may call it a different name, but the idea is the same: an attempt to tell you, the user, how much juice is left in your batteries.) The results of my measurement were quite surprising.
This comments section is not intended for any kind of technical discussion. If I got into electronic terms, most would not understand it and rightly ignore it. I must condense my findings into something simple. But one thing you need to know is how to gauge the health of an alkaline battery. You can do this by measuring its “voltage” using a simple meter. A fresh alkaline will have a battery voltage of between 1.5 to 1.6 volts. As the battery discharges, its voltage will slowly decrease. A half-discharged battery measures about 1.25 volts. When the battery is fully discharged, its voltage will measure about 1.0 volts (some might prefer 1.1 volts). These numbers are approximations, but are reasonably accurate.
Next, you must understand how a controller app determines the state of the battery of the ZSE40. It is NOT the app that does the measurement. It is the ZSE40 itself. It reads the batteries’ voltage, computes “something,” and then spits back a value between 0 to 100 to the app that specifies the batteries’ health, as a percentage. This is the number that you all read. From my above description of an alkaline battery’s state of health as measured by voltage, you would think that 100% would translate to a voltage of 1.5 to 1.6 volts, and that 0% would translate to a voltage of about 1.0 to 1.1 volts. You would THINK that, wouldn’t you?
Think again. For whatever reason, the hardware and/or firmware in the ZSE40 considers a battery voltage of 1.3 volts to be at 0%. As in “dead battery.” I’m here to tell all of you that an alkaline battery with 1.3 volts across it is quite healthy, having about 60-80% of its capacity still remaining. Yet, the Zooz ZSE40 translates any voltage of 1.3 volts or less as 0% remaining capacity. The sensor tells you to throw away your batteries when they in fact they are still very healthy, and commenters respond with “eats batteries!” You will notice that even though the controller app says your batteries are exhausted, the sensor still continues to work just fine. It only confirms that there is still a lot of gas left in their little tanks, despite what the gauge says! Once you see “0% capacity remaining,” you have no idea if your batteries have 80% capacity remaining or 1% remaining. You’re flying blind at this point.
A last point to be made is that the sensor ceases working when the battery voltage drops to 1.1 volts per cell. This shutoff leaves a bit more battery energy on the table, so it is a bit wasteful, too.
This, folks, is why many of you observe short battery life. It is not the fault of the app, it is not a coding error in your app, it is the fault of the ZSE40 sensor for reporting this erroneous number to the app. The app writers can only report the information that the sensor gives it, even if it is wrong. And it is.
I give it two stars because while the fuel gauge is thoroughly messed up, the sensors themselves are decent. Zooz should either update the firmware (mine is 16.09, BTW) or should not be shipping a product so flawed.
++++++++++++++++++++++++
For those of you who want a bit more detail, here is how the sensor converts battery voltage (I’ll call it Vbatt) and Capacity remaining (I’ll call it CR, expressed in percent) as the ZSE40 passes it to your controller:
CR = (Vbatt – 1.3) * 500 (in percent)
or conversely
Vbatt = (.002 * CR) + 1.3 (in volts, for 1.3V ≤ Vbatt ≤ 1.5V)
So 1.50V or higher reads as 100%, 1.46V reads as 80%, 1.42V reads as 60%, 1.38V reads as 40%, 1.34V reads as 20%, and 1.30V or less reads as 0%. If you understand anything about alkaline batteries, you know that these numbers are complete nonsense, as they paint just about any alkaline as far, far weaker than it really is.
rob –
SmartThings user and developer here. I got my first sensor from TheSmartestHouse.com, because I wanted to try a new multi-sensor that was a bit more affordable than some others. Being no stranger to having to write some code for a device that hasn’t been officially adopted to SmartThings, I figured it should be straightforward. The nice part about any Z-Wave certified device is they have to be made to their standards and communicate to the standards, thus writing code for them tends to be, predictable… You can find the fully optioned and functional version here (currently version 1.1):
[…]
If you’d rather have temperature be the main tile, use this alternate one:
[…]
Stuff I like:
* Its size and form factor. It’s quite unobtrusive to anyone used to typical home alarm motion sensors.
* What comes in the box. All kinds of mounting brackets. You should be a NO lack for the right stuff to get this sensor mounted where and how you want it.
* The fact it uses 2 regular AAA batteries. This sounds like a simple thing, but…
* The regular reporting of sensor data. Also sounds like a simple thing, but check forums for all the folks who just want updated values on a regular basis. If you’re wanting to control a humidifier, or a window AC unit or anything that needs to be responsively managed, this is for you.
* The notification LED is actually usable. YES, you have to be looking at it, but it does actually blip colors based on whats up. Maybe more a novelty but I can see it out of the corner of my eye and know it is doing something (without staring at an app). I do provide controls for that in my device type by the way…
* IT IS ACTUALLY PRETTY DARN ACCURATE! Again, seems like a no brainer. I have a bunch of different multisensors at my house and The only one I trust implicitly is the $500 Carrier MyTouch thermostat on my wall! HA! And, actually, this sensor reads to within tenths of a degree temperature wise and about 1 percent relative humidity when placed next to that thermostat. The others no. Some are off by 4 degrees and 9 points of humidity!
* Another accuracy win, the light sensor! OK, so it reads in percent… like 0 is dark and 100 is fully lit.. whatever that means.. it isn’t in candles or lux like we would even (most of us) know what those numbers equated to, but REALLY quickly you figure out what it is talking about. The also, thoughtfully, put the light sensor on the front face, UNOBSTRUCTED by the plastic housing, but as you can see (the top left dark spot) it doesn’t look bad. I don’t think so anyway.
* Other developerish stuff I wont bother commenting about…
What I DONT like…
* The action button as mentioned by another reviewer, needs to be pressed with something small. An unbent, naked paperclip (not the plastic ones) works fine, as does a thumbtack. I am rather leery about sticking sharp objects into electronics though. I would ask that future versions have a more accessible action button.
* It isn’t IP anything rated. That I know of… Maybe I could pull it all apart and coat it with something, but… I’d like to be able to use it outdoors. Under shelter of course… I suppose I could throw it out there and find out, but… I’ll let the vendor comment on that. I did read the instructions and it says indoor use only.
* Working temperature range. This is definitely a “home sensor” meaning an in your comfy house sensor. I live in Houston, and say I wanted to put it in my attic to drive a fan or something.. I’m not sure based on the product lit and the hot Houston summers whether it would survive.
That’s it. I liked it enough I impulse bought another on Amazon! Thanks Amazon, yes you know me well. I’d say it is a pretty great device especially since of my three cons, 2 of them are unknowns… Way to go guys! can’t wait to see what you come up with next!
Nathan –
I was a little worried when I purchased this product because of the two bad reviews. I figured the others just didn’t set it up correctly. Well I’m glad I gave this Sensor a shot.
1. Open the package
2. Look for new device on you HUB, (Mine is SmartThings)
3. Press the Z-wave Button 2x with a paperclip.
4. Include found Zwave Motion sensor.
To get the most out of this device on Samsung’s SmartThings api: (graph.api.smartthings.com)
5. Copy one this device handler “device_type-zooZ-4-in-1-Sensor-ZSE40_v1.1” text to your clipboard (First link is Temp is your primary use, second link if Motions is your primary use.)
github.com/robertvandervoort/SmartThings/blob/master/zooZ-4-in-1-Sensor-ZSE40/device_type-zooZ-4-in-1-Sensor-ZSE40_v1.2
github.com/robertvandervoort/SmartThings/blob/master/zooZ-4-in-1-Sensor-ZSE40/device_type-zooZ-4-in-1-Sensor-ZSE40_v1.2_motion_primary
6. Create a new device handler and paste copied text into the code section.
7. ‘Create’ , ‘Save’ , ‘Publish’
8. ‘Edit’ the device type and change it to the device you just created and ‘Update’ it.
9 Mount it and enjoy!!
Joseph –
After using two of these for over a year now, I have discovered that they constantly give false motion detections. I have them set to the least sensitive mode and they still detect motion that doesn’t exist. I now use them for measuring temperature and humidity, but removed them from my Armed Away feature in Samsung SmartThings. Too bad, in all other respects, they do the job.